Edge Board

How Much Edge Board Do You Actually Need?

Walk into any Australian removals supply shop and they will happily sell a stack of edge board. The tricky bit is knowing how much is enough, without overbuying and lugging leftovers back to the ute.

This guide breaks it down in plain terms. It sticks to real packing situations in Australia, from metro moves in Sydney and Melbourne to regional runs where the roads are rougher and the trip is longer.

What is edge board, and what does it actually protect?

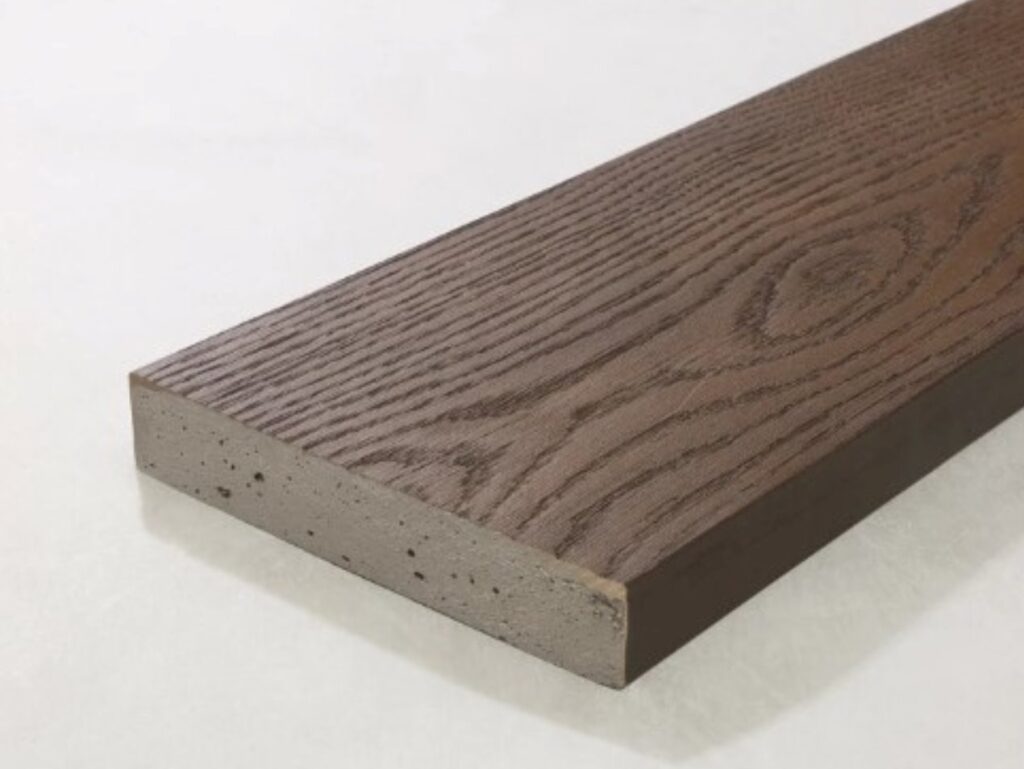
Edge board is rigid cardboard or fibreboard strips that sit on corners and edges to stop crushing, dents, and strap damage. It spreads pressure so boxes, furniture and palletised loads do not take the full force in one spot.

In most household moves, edge board matters most for sharp corners, long edges, and anything getting strapped down. Think dining tables, framed art, white goods, flat pack boxes, and stacked cartons in a lorry.

How much edge board do they need for a typical household move?

For an average 2 to 3 bedroom Australian home, a practical starting point is 20 to 40 lengths of edge board, assuming standard 1.2 m strips. That usually covers the main furniture corners plus a handful of high risk cartons and appliances.

If they are doing a quick same suburb move with careful hand loading, they can sit closer to the low end. If it is a full day load, tight lorry pack, or multiple drop offs, the higher end starts to make sense.

What factors change how much edge board they should buy?

The biggest drivers are load density, strapping, and fragility. If they are strapping items hard to the lorry wall or to pallets, edge protection needs jump fast.

Distance also matters in Australia. A move from Brisbane to Rockhampton, or Perth to Kalgoorlie, is a different beast than shifting across town. More vibration and more handling usually means more edge board is worth it.
Edge Board

How do they calculate edge board for strapped items?

They should plan four pieces of edge board per strapped item as a baseline, one for each corner where a strap could bite. Add two more if the item is tall or the straps are likely to sit across broad faces and edges.

For example, a fridge strapped upright commonly needs 4 to 6 strips. A washing machine might need 4. A tall bookcase can need 6 to 8, depending on strap layout and whether it is bundled with other pieces.

How much edge board is needed for a dining table or desk?

Most tables and desks need 4 to 8 strips of edge board. Four strips cover the outer corners, and extra strips cover long edges if the item is getting strapped or stacked against something hard.

For a big hardwood table, especially if it is going into a removals lorry with tight packing, they often use 8 strips. It is one of those items that shows damage instantly, so overprotecting is rarely regretted.

How much edge board do they need for boxed items?

For cartons, they do not need edge board on every box. They should reserve it for stacks that are being strapped, or for high-value boxes like glassware, electronics, or artwork.

A good working rule is 1 strip per 3 to 5 boxes in a strapped stack, placed on the corners that take pressure. If they are building a tall stack in a truck bay, edge board helps stop the bottom boxes from collapsing at the corners.

Do they need edge board for artwork, mirrors, and TVs?

Yes, if it is framed, glazed, or has a rigid screen, edge board is cheap insurance. They should aim for 4 strips per item, plus extra if the item is large and likely to flex or be clamped by other furniture.

In Australian moves, this is especially relevant when items ride in a trailer or a small lorry without dedicated picture rails. Edge board prevents the dreaded corner crush that happens even when the face looks fine at first glance.

How does palletising change how much edge board they need?

Pallets eat edge board. If they are palletising storage or freight, they should expect 8 to 12 strips of edge board per pallet, depending on height and how many strap lines or wrap passes they use.

Two vertical corners per side is a common setup, then additional strips where straps cross. For interstate freight out of Sydney, Melbourne, or Adelaide, carriers often expect proper edge protection so straps do not damage cartons.
Edge Board

Is it better to buy longer or shorter lengths?

Longer strips reduce joins and weak points. In practice, 1.2 m is a common sweet spot in Australia because it fits most furniture edges and stores easily in a garage.

Shorter strips are handy for small corners and box stacks, but they can disappear quickly. If they are trying to avoid waste, longer lengths that can be cut down with a utility knife usually work better than buying only short pieces.

What is a simple room by room estimate they can follow?

They can estimate edge board by counting risk items per room and assigning strips. It is not perfect, but it keeps buying decisions grounded.

Here is a simple approach that suits many Australian homes:

  • Living room: 8 to 16 for TV, console, coffee table, frames
  • Dining: 8 to 12 for table and chairs
  • Kitchen laundry: 8 to 16 for fridge, washer, tall pantry items
  • Bedrooms: 4 to 12 for tallboys, desks, mirrors
  • Garage shed: 4 to 10 for tool cabinets, awkward boxes

This style of tally usually lands them in the 20 to 40 range, then they adjust for strapping and distance.

When are they probably overbuying edge board?

If they are planning to put edge board on every carton and every chair leg, it is probably too much. Most damage in moves comes from pressure points, straps, and hard corners, not from the middle of a box panel.

A tell is when they cannot explain what each piece is protecting. If they cannot name the strap line or the edge at risk, they can likely remove that strip from the plan.

What is the minimum edge board they should not go below?

For a small unit or studio move, 10 to 15 strips of edge board is a sensible minimum. That covers a fridge or washing machine, a desk, and a couple of fragile items.

For a 2 to 3 bedroom home, going below 20 often means they will start skipping the most important corners. That is when strap marks and crushed edges appear, especially on longer Australian drives.

How do they make edge board go further without losing protection?

They should prioritise corners that take load and strap pressure, then re-use pieces during unloading. Edge board can be pulled off and shifted to the next item as soon as something is placed safely.

They can also pair it with moving blankets and stretch wrap. The blanket cushions, the wrap holds, and edge board takes the bite. Done together, they often need less edge board overall because each piece is doing a clearer job.
Edge Board

What should they buy for an Australian move, in one quick recommendation?

For most people, the safest buy is 30 strips of edge board for a 2 to 3 bedroom home, then adjust up if they are strapping heavily or going interstate. For a 4 bedroom home or a long distance move, 40 to 60 strips is more realistic.

If they want a no fuss rule, this works well: assume 4 to 6 strips of edge board per major appliance or large furniture item, then add 10 for fragile and boxed stacks. It is not fancy, but it stops most of the common damage seen in Australian moves.

Edge board is one of those supplies that feels optional until the first crushed corner shows up. Buying the right amount keeps the load neat, straps safer, and the unpacking a lot less painful.

FAQs (Frequently Asked Questions)

What is edge board and how does it protect my belongings during a move?

Edge board is rigid cardboard or fibreboard strips that fit on corners and edges of items to prevent crushing, dents, and strap damage. It spreads pressure evenly so boxes, furniture, and palletised loads don’t bear the full force in one spot, protecting sharp corners, long edges, and strapped items like dining tables, framed art, white goods, and stacked cartons.

How much edge board should I buy for a typical household move in Australia?

For an average 2 to 3 bedroom Australian home, start with 20 to 40 lengths of standard 1.2 m edge board strips. This usually covers main furniture corners plus several high-risk cartons and appliances. For quick local moves with careful loading, aim towards the lower end; for full-day loads or tight packing with multiple drop-offs, consider the higher end.

What factors influence the amount of edge board needed for a move?

Key factors include load density, whether items are strapped down tightly, fragility of possessions, and distance of the move. Moves involving strapping items to lorry walls or pallets require more edge protection. Longer trips on rougher roads increase vibration and handling, making additional edge board worthwhile.

How do I calculate how many pieces of edge board are needed for strapped items?

Plan on using four pieces of edge board per strapped item as a baseline—one for each corner where straps may cause damage. Add two more strips if the item is tall or straps cover broad faces or edges. For example, an upright fridge typically needs 4 to 6 strips; a washing machine about 4; and a tall bookcase may require 6 to 8 depending on strap layout.

Is edge board necessary for artwork, mirrors, and TVs during a move?

Yes. For framed or glazed artwork, mirrors, and TVs with rigid screens, edge board acts as inexpensive insurance against corner crush damage that might not be visible immediately. Aim for at least four strips per item plus extras for larger pieces prone to flexing or clamping by other furniture—especially important in trailers or small lorries without picture rails.

How can I estimate edge board requirements room by room for my Australian home move?

A practical approach is to tally risk items per room and assign strips accordingly: Living room (8–16 strips) for TV, console, coffee table; Dining area (8–12) for table and chairs; Kitchen/laundry (8–16) for fridge, washer, pantry items; Bedrooms (4–12) for tallboys, desks, mirrors; Garage/shed (4–10) for tool cabinets and awkward boxes. This method typically totals 20 to 40 strips before adjusting for strapping intensity and travel distance.

SEE ALSO: What Goes Wrong When Hi Vis Clothing Is Specified Badly
Hi Vis Clothing

What Goes Wrong When Hi Vis Clothing Is Specified Badly

Most people only notice high visibility workwear when it fails. Someone blends into a grey dawn. A vest looks bright in the lunchroom but disappears near headlights. A delivery driver steps onto a wet verge and the reflective tape is… nowhere.

Bad specs do not just create annoying admin. They create gaps. In compliance, in comfort, in brand reputation, and sometimes in safety outcomes.

This article breaks down what typically goes wrong when hi vis clothing is specified badly across Australian sites, fleets, councils, warehouses, and rail corridors. Not in theory. In the boring, costly, everyday way it actually happens.

What does “specified badly” actually mean for hi vis clothing?

It means the garment requirements are vague, copied from an old contract, or based on assumptions rather than the real work environment. It also means the buyer cannot clearly prove the garments meet the right Australian standards for the task.

When hi vis clothing is specified badly, the wrong class, colour, fabric, or reflective configuration gets purchased. Then everyone is stuck with stock they cannot use, or worse, they use it anyway.

Why do teams end up with the wrong compliance class?

They often specify “hi vis” as a generic category, without calling up the correct standard and garment class. The result is garments that look bright but are not appropriate for the risk profile.

In Australia, visibility workwear is typically specified to AS/NZS 4602.1 for high visibility garments, with day, night, or day/night performance. If a site needs day/night and receives day-only polos, hi vis clothing becomes a box ticking exercise, not a control.

Hi Vis Clothing

How do colour choices create problems on Australian sites?

They pick a colour that clashes with the environment, the role, or the client requirement. Bright yellow works well in many places, but not all. Orange is common around road and rail, but it is not automatically “better”.

Bad specs also ignore fading. A fluorescent yellow that looks correct on delivery can wash out quickly in the Pilbara sun. Then hi vis clothing quietly slips below what people expect, long before anyone replaces it.

What goes wrong with reflective tape layouts and performance?

They specify “reflective tape” without defining placement, width, or performance expectations. Or they approve a layout that technically complies, but does not suit how workers move and bend.

Tape can be blocked by harnesses, backpacks, tool belts, and wet weather layers. If the spec does not consider that, the wearer’s visibility at night drops. Hi vis clothing ends up reflective in the wrong places, at the wrong time.

Why do fabrics and garment weights cause unexpected failures?

They select fabric based on price or catalogue descriptions rather than site conditions. Heavy cotton might be great for welders, but awful for humid coastal work. Light polyester might breathe, but melt risk matters near heat sources.

Inaccurate fabric specs also lead to premature tearing, seam blowouts, or shrinkage. Then hi vis clothing becomes a constant replacement cycle, which looks cheap but costs more.

How can poor sizing specs undermine safety and productivity?

They forget sizing is a specification issue, not a “figure it out later” issue. If the range does not cover real bodies, people wear tight garments that restrict movement, or oversized garments that snag.

This matters with women’s fits, tall sizing, and seasonal layering. If a winter jacket is specified without allowance for hoodies beneath, hi vis clothing becomes uncomfortable, and people stop wearing it properly.

What happens when the spec ignores the actual job tasks?

They buy the same garments for everyone because it is easier. Then a traffic controller, a forklift operator, and a site supervisor all receive identical kits even though the hazards differ.

A good spec maps garments to tasks. Wet weather. Night works. Bushfire smoke. Vehicle interactions. If the spec ignores this, hi vis clothing is treated like uniform branding instead of PPE aligned to risk.

Hi Vis Clothing

Why do laundering and care requirements get overlooked?

They assume workers will “just wash it”, and they do not specify industrial laundering compatibility, colour fastness expectations, or tape durability. Then reflective performance drops after a few wash cycles.

Some councils and utilities use industrial laundries. Others rely on workers laundering at home. Without clear care labelling expectations and replacement triggers, hi vis clothing degrades silently until it is essentially decorative.

How do logos, printing, and heat transfers create compliance headaches?

They add large logos over fluorescent panels or reflective tape, or they place dark prints that reduce the visible background area. It looks fine in a mock-up, then it fails a compliance check, or triggers a client audit issue.

Sometimes the garment is compliant before branding, then non-compliant after. A good spec controls logo size, placement, and methods. Without that, hi vis clothing becomes a branding project that accidentally reduces visibility.

What are the most common procurement mistakes that drive poor outcomes?

They specify by product name only, or they allow “or equivalent” without defining what equivalent actually means. Then suppliers substitute fabrics, tape, or garment patterns to hit price points.

They also forget to lock down change control. A sample is approved, then bulk delivery differs slightly. With hi vis clothing, “slightly” can mean different tape, different colour, different compliance markings, and no one catches it until it is on site.

How do Australian weather and geography amplify specification errors?

They underestimate extremes. Darwin humidity. Melbourne cold snaps. Perth heat. Canberra frosts. Regional NSW dust. Coastal salt air. Far North Queensland storms. All of it hits garments hard.

If the spec does not plan for UV exposure, ventilation, wet weather systems, and seasonal rotation, hi vis clothing fails earlier and gets worn less. People adapt by unzipping, rolling sleeves, or swapping layers that are not visible.

What does a bad hi vis clothing spec cost, beyond the purchase order?

It costs rework. Time spent in toolbox talks explaining exceptions. Returns and reorders. Friction between procurement and safety teams. Delays to mobilisation, especially for projects with strict site entry requirements.

There is also reputational cost. Clients notice inconsistent PPE. Workers notice cheap gear. And when hi vis clothing looks poor or performs poorly, it undermines confidence in other safety controls too.

Hi Vis Clothing

How can teams specify hi vis clothing properly, without overcomplicating it?

They start with the environment and the task, then work backwards into the standard, class, and garment design. They also define the “must haves” and the “nice to haves” clearly, so substitutions cannot sneak in.

At minimum, a practical Australian spec for hi vis clothing typically includes: required AS/NZS standard, day or day/night requirement, colour, tape configuration, fabric composition and weight, size range, branding rules, laundering expectations, and a sample approval process tied to the bulk delivery.

FAQs (Frequently Asked Questions)

What does ‘specified badly’ mean for hi vis clothing on Australian sites?

‘Specified badly’ means the garment requirements are vague, copied from old contracts, or based on assumptions rather than the real work environment. It also indicates that buyers cannot clearly prove the garments meet the correct Australian standards for the task, leading to wrong class, colour, fabric, or reflective configurations being purchased.

Why do teams often end up with the wrong compliance class of hi vis clothing?

Teams frequently specify ‘hi vis’ as a generic category without referencing the correct standard and garment class. In Australia, hi vis clothing should comply with AS/NZS 4602.1 for day, night, or day/night performance. Receiving day-only garments when night visibility is required turns hi vis clothing into a mere box-ticking exercise rather than an effective safety control.

How can colour choices affect the effectiveness of hi vis clothing in Australia?

Colour choices can clash with the environment, role, or client requirements. While bright yellow works well in many settings, it may not be suitable everywhere. Orange is common around road and rail but isn’t automatically better. Additionally, fluorescent colours can fade quickly under harsh conditions like the Pilbara sun, reducing visibility before replacements occur.

What issues arise from poor reflective tape layouts and performance in hi vis clothing?

Specifying ‘reflective tape’ without defining placement, width, or performance leads to tape being blocked by harnesses, backpacks, tool belts, or wet weather layers. Even compliant layouts may not suit worker movement and bending patterns, causing reduced visibility at night and rendering hi vis clothing reflective in ineffective areas.

Why is fabric choice critical for hi vis clothing’s durability and comfort?

Selecting fabric based solely on price or catalogue descriptions rather than site conditions causes problems. Heavy cotton suits welders but is unsuitable for humid coastal areas; light polyester breathes but poses melt risks near heat sources. Poor fabric specifications result in premature tearing, seam blowouts, shrinkage, and increased replacement costs.

How do laundering and care practices impact the longevity of hi vis clothing?

Assuming workers will ‘just wash it’ overlooks industrial laundering compatibility, colour fastness, and tape durability needs. Without clear care labelling and replacement triggers, reflective performance degrades after a few washes. Variations between industrial laundry use and home washing cause silent deterioration until garments become merely decorative.

SEE ALSO: How Commercial Real Estate Asset Management Improves ROI